Connect with Nature: Make Pressed Flowers

Guest blogger Rebecca Kennedy
This post was written by guest blogger Rebecca Kennedy.
The art of pressed flowers spans cultures and time periods, from Victorian England to the Japanese art of ochibana. Pressing flowers is a wonderful way to preserve your memory of a special day or a particularly good year for your garden. There are several ways to press them, but here we will go with the traditional (and energy-saving) method of using a heavy book.
Choosing and picking flowers
The easiest flowers to press are those with flat faces and thin stems. Larkspur, daisies, violets, primroses, snowdrops, and pansies are good candidates. More multidimensional flowers such as roses, tulips, and carnations, will require more preparation. It is best to split those in half or even better, to dry individual petals.
Pick flowers that are as fresh as possible—those that are not wilted or browned. Pick your plants on a dry, sunny day, after the morning dew has dried off. It is important that the flowers are not wet, as they may become mouldy or darken during the pressing. It is also essential to press your plucked flowers as soon as possible, as they will begin to wilt or brown. If you cannot press them right away, store them in a sealed plastic bag in the fridge.
 Supplies needed
- Flowers.
- Sharp scissors or a small sharp knife.
- Tweezers (optional).
- A flower press or a heavy book. You can buy a flower press (or make your own!), but to keep it simple, instead use something you may already have around your home, such as a thick phone directory or an encyclopedia, or another weighted object that will allow your flowers to lie flat and unexposed to light and the elements.
- Absorbent paper. To prevent damage to the book, such as staining, place the flowers between two sheets of an absorbent paper. Parchment paper, printer paper, or non-corrugated flat coffee filters work well. (Tip: Don’t use paper towels, as that may result in the inadvertent imprint of the towel’s pattern onto a pressed flower.)
- A brick or heavy rock.
Instructions
- Trim and prep the flowers. Clip off stems completely or short enough to fit on the drying paper. You may need to gently manipulate petals with your thumb and forefinger to flatten them or look the way you want.
- Lay flowers flat. On a sheet of absorbent paper that fits within the pages of the heavy book, arrange flowers with your fingers or a pair of tweezers. They should be as flat as possible and spaced apart so they are not touching. Top with another sheet of paper.
- Place in book. Transfer the flower “sandwich” carefully into the heavy book. Close the book slowly, taking care that the flowers stay positioned as you arranged them. Place the brick on top of the book.
- Wait. Let dry for 10-14 days and check. Different types of flowers have different drying times, but those with less bulkiness will be fully dry, usually, within 3 weeks.
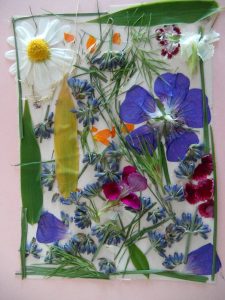
Once fully dried, keep pressed flowers stored between sheets of acid-free paper or in waxed envelopes. You can use pressed flowers in a variety of crafts and home decor, from a simple homemade card to a tasteful framed print.
Acknowledgements: ProFlowers, RedTedArt, The Art of Pressed Flowers